SSQS Frog Site - Public on web link:
https://wbc0144.1bestarinet.net/ssqs2015
Screenshots for three tabs:


How to Create a New Frog Site |
Steps 1: Log in

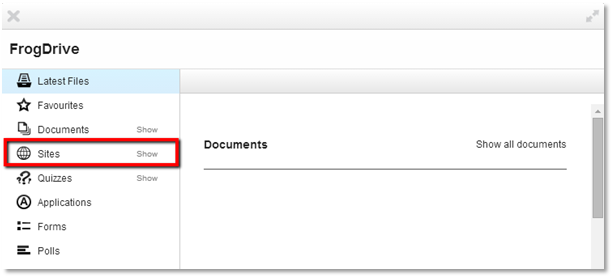
Steps 2: To access Sites click on FrogDrive in the Frog Bar.
Steps 3: To create a site, click on the blue New Site button. This is located in the top bar of the My Sites area.

Steps 4: Select the "Blank template"

Steps 5: Once you have chosen a template you can name your site and give it a description.

Example:
- Give your site a name: SSQS 2016
- Write a brief description of your site : Thank you for your time and please submit it to us as soon as possible.
Steps 6: These items can be updated at any time should you change your mind in the future. | ||||
| Click the Next button to continue customising your site. |

Steps 7: Continue customising your site you can now select a Theme & Icon.

The Theme of your site controls it look and feel. There are a number of themes to choose from.

You can now select an icon for your site. The default icon will already be visible in the preview area.

You can upload an image from your desktop or device with the Upload button.

I am here to share an icon that I love to use it for SSQS site:

You can download it and upload to your site setting.
Steps 8: Add "Tag and Keywords", then "Create":

- Tag: Non Academic , Pentadbiran ===>Add
- Keywords : (ignore)
Steps 9: Congratulations! You have now created a new site. Please remember share it out.

How to Name and Add Pages to a Site |
Steps 1:
| By default the active page is named New Page. To change the page name you must be in edit mode. |
| Click on Edit in the Up-left side. |
| Click on Page in the Content Panel. |

Type in the new name for your page in the input box. For this example we have used the title ‘Mengenai SSQS’. The tab will now be labelled as ‘Mengenai SSQS’.
Steps 2:
| Now we are going to add more pages to the site. A site may have multiple pages each with their own access tab. |
| To add more pages to your site click on the + sign to the right of the ‘Mengenai SSQS’ tab. |

Enter the name of the page by double clicking on the New Page text.

- Second Tab: Token and Web Link
- Third Tab: Upload

Page 1 Tutorial: |
Page Setting:
- Layout : Boxes-1
Widgets:


Step 1 : Edit > Widgets > Select the widget, then drag and drop it as below

Step 2 : Click on the Layout Box to display the settings for the Media Widget.

Upload this file :
(Right click and select "save image as", then upload it to your "Media" widget)

Step 3 : "Ab Text" widget


(Copy below text into it:)
SSQS (Smart School Qualification Standards) adalah sistem penarafan bintang yang dicapai oleh sekolah-sekolah seluruh Malaysia. Tujuan pelaksanaaan SSQS adalah untuk menilai amalan-amalan terbaik bagi pembudayaan ICT di 88 buah sekolah Bestari dan diperluaskan ke semua sekolah di seluruh negara. Aplikasi ini digunakan untuk membuat kajian dan mendapatkan maklumbalas berkaitan pembudayaan dan penggunaan ICT di sekolah. Bermula penggunaan secara manual di semua sekolah bestari dan kini aplikasi telah dibina secara "on-line" dan diperluaskan bagi membuat penarafan di semua sekolah seluruh Malaysia.
Objektif SSQS:
Objektif SSQS:
- Menjadi satu sistem petunjuk untuk mengukur penggunaan ICT dalam pendidikan,
- Memberi asas untuk perancangan polisi dan pembaikan program,
- Menaiktaraf piawaian dalam pendidikan,
- Menjadi pemangkin (catalyst) untuk perubahan dalam pendidikan, dan
- Memperkasakan (empower) guru dan murid.
Page 2 Tutorial: |
Page Setting:
- Layout : Boxes-1
Widgets:

- "External Link"
- Make-a-copy of this Google Sheet : Link
- Select "Make-a-copy" , this file will auto save in your Google Drive.
- Copy the url and paste it to your "External Link" widget.

- "Embed Website"

Click "Share"
In the "Share with others" Box, click on the bottom right side "Advanced"

Select "On-Anyone at Yes with the link"
Then, go to "Access: Anyone within Yes", select "Can edit"
- "External Link"
Copy the link from Portal BTPN "SSQS 2016"

- Copy the url and paste it to your "External Link" widget.
Page 3 Tutorial: |
Page Setting:
- Layout : Boxes-2


Widgets:
- "AB Text"
- Pentadbir, GPM, Guru
- Murid

- "File Drop"

How we filled up our SSQS last year |


Anugerah SSQS Peringkat Kebangsaan Tempat Kedua